Salted egg custard buns (Liu Sha Bao)

liu sha bao

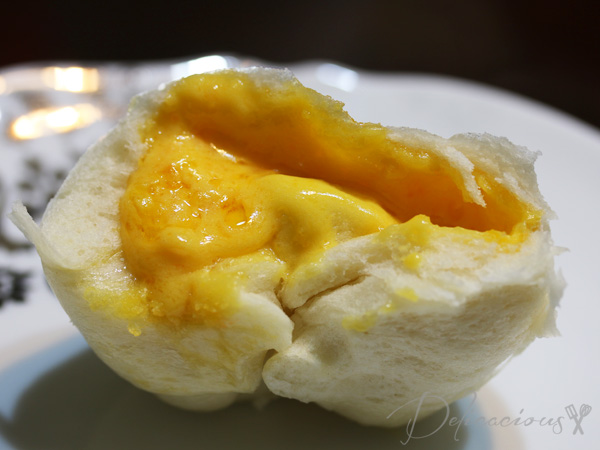
The person who created salted egg custard buns or Liu Sha Bao is a genius. Pure genius. Sweet yet savory fluid custard. Definitely one of my favourite dim sum items, and of those foods where I think that the calories are worth spending on. I had never quite thought of trying to make Liu Sha Bao at home as it did seem rather complicated. How does one wrap fluid custard in dough? Well, it so happened that I had a couple of extra salted eggs sitting around (extras from mooncake making) and so I decided to experiment. I read up a couple of recipes from books and the internet and settled on a combination of a few recipes plus some gut feel.

The best tip I found was from Bake for Happy Kids. She recommended keeping the custard filling in the fridge overnight (several hours will suffice actually) so that it hardens and that would make it easier to wrap it in dough. Why didn’t I think of that? For the dough, I used an oil based dough (read: no shortening). It’s a little more chewy than the shortening based dough, but it contrasts pretty well against the fluid custard. However, I realised that oil based dough doesn’t keep as well the next day – when the buns are reheated the next day, they become slightly tougher. If the buns are consumed the day they are made, I would recommend using the oil based dough. Otherwise, for a softer bun, you can use the dough in this recipe. It uses shortening, but I’ve just found out that Crisco shortening does not contain trans-fats! Now I can use shortening without guilt.

Ready to try your hand at making some LSB? Here’s the recipe!

Salted egg custard buns (Liu Sha Bao)
 
Author:
Ingredients
Salted Egg Custard
  • 5 salted egg yolks, steamed
  • 60g unsalted butter, room temperature
  • 40g icing sugar
  • 30g custard powder
  • 45g milk powder
  • 5g corn flour
  • 30ml fresh milk
Dough
  • 300g hongkong flour
  • ½ tsp active yeast
  • ½ tsp baking powder
  • 20g sugar
  • 15ml vegetable oil
  • 140-150ml warm water
Instructions
Salted yolk custard filling
  1. Mash steamed salted yolks with a fork into fine bits.
  2. Using a wooden spoon, cream butter and icing sugar till light and creamy.
  3. Add in the rest of the ingredients, including the salted egg and mix till smooth.
  4. Cover with cling wrap and refrigerate till firm.
Dough
  1. In the bowl of a standing mixer fitted with a dough hook, mix all the dry ingredients together.
  2. Mix oil with water and with the mixer on at low, add in the water mixture in a slow stream.
  3. Knead for about 5 minutes, or until dough is smooth and elastic.
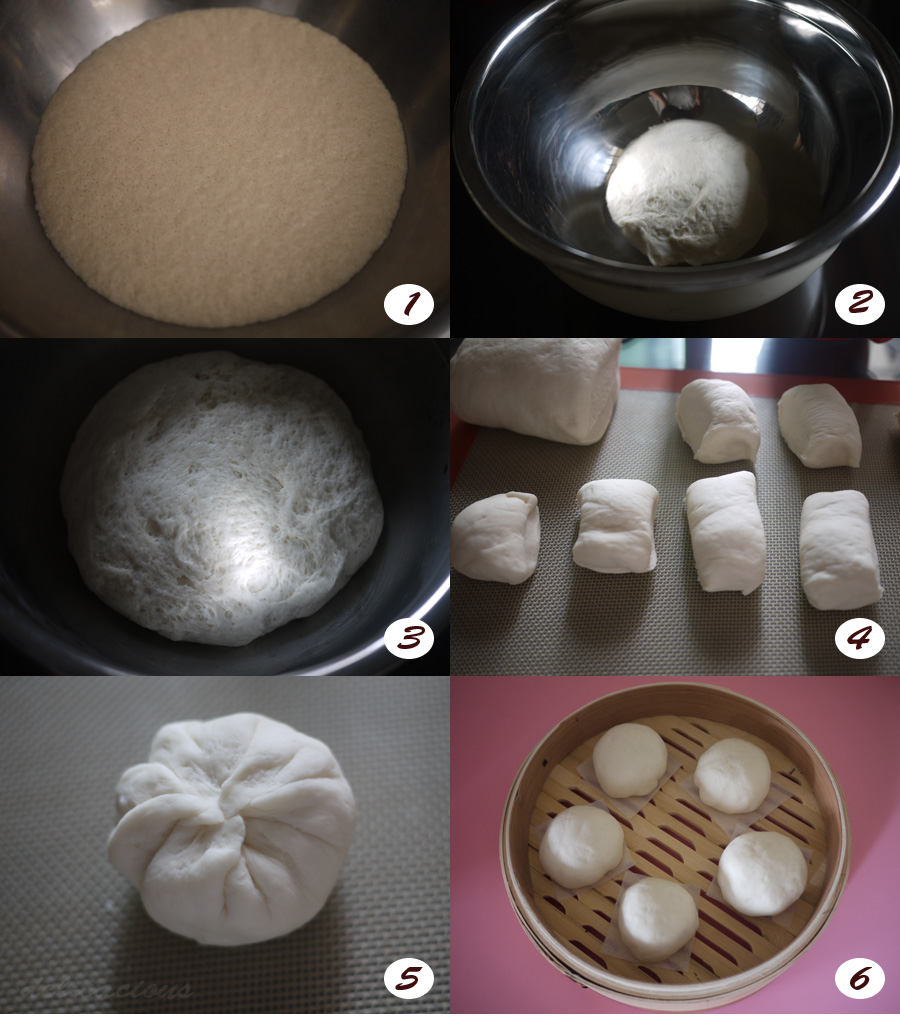
  4. Shape dough into a ball and place inside an oiled bowl. Cover with cling wrap and allow dough to rise for about an hour, or until double its original size.
  5. Remove dough from bowl and shape dough into a log. Divide into 12 equal pieces.
  6. Divide custard filling into 12 balls (I use a metal spoon for this).
  7. Flatten each piece of dough into a disc, place the filling inside and seal dough around the filling. Place bun, sealed side down, on a small piece of waxed baking paper. Alternatively, you can place the bun in small foil liners.
  8. Allow buns to rest for 15 minutes.
  9. Steam over medium heat for 8-10 minutes. Enjoy hot.
  10. If storing, cool them down to room temperature before storing them in the refrigerator. Re-steam before consuming.
Notes
Adapted from Bake for Happy Kids and Chef Chan Dim Sum book


Steamed Garlic Prawns

steamed garlic prawns 2

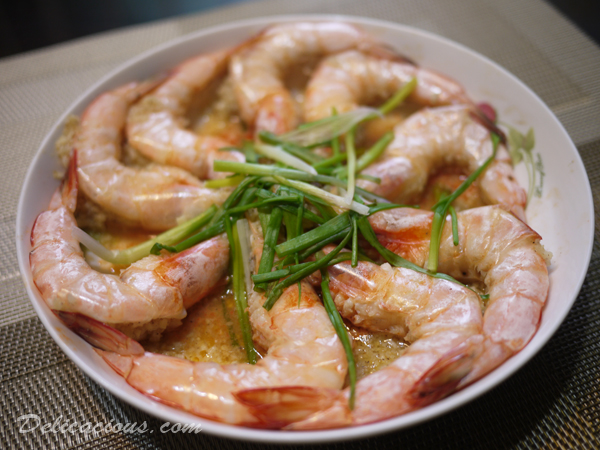
I seldom cook on weekdays. By the time I get back from work, it is a little late to start preparing for dinner and so I am grateful that my mom usually takes care of it. On weekends, I try to cook up the odds and ends in the fridge before the stockpile arrives on Tuesday (marketing day). So it happens that while I was going through the freezer, I found 9 of these large prawns.Continue Reading

Steamed Red Bean Buns (Tau Sar Pau)

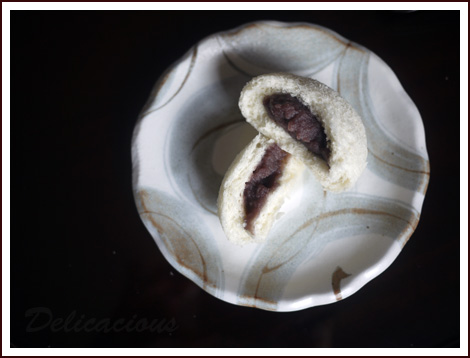
red bean buns1

Two weeks ago, my mother went for a class to learn how to make steamed red bean buns. A few days later, she tried to replicate the recipe with not-so-successful results. The bread of the buns tasted weird, and the red bean filling was grainy. Needless to say, she was rather discouraged even though we tried to render support by eating a few of the buns.

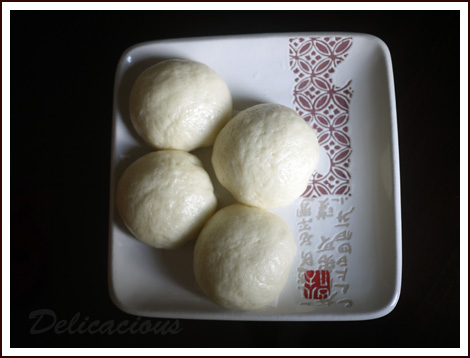
red bean buns 2

So on Saturday, in preparation for Mother’s Day, I decided to make my version of steamed red bean buns. I combed through many variations of making red bean paste and pau dough, and came up with my own variation. It was a success! True, it was much work making the red bean paste from scratch and it required some forward planning, something that is not my forte. But the results were rewarding – especially when the red bean paste actually tastes like red bean, and not some sweetened mush that you buy in a packet.

red bean buns 3

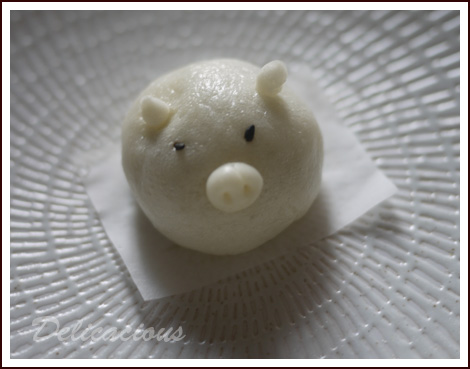
My husband participated in the making of the buns too! His favourite activity? Making animal faces. He became very popular with my daughter after she saw this little piggy. His effort disappeared in a couple of minutes though, as my daughter declared that she was going to eat the piggy soon after she saw it.

So you’ve decided that you want to embark on the journey of making your very own steamed buns? Here are some photo tips.

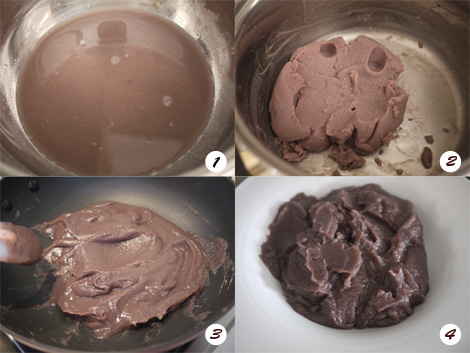
red bean paste steps

  1. When straining the red bean paste into the bowl, immerse the sieve into the red bean water. This will help remove the skins. After straining the paste twice, you should get a water red bean paste mixture.
  2. When squeezing out excess water, be careful not to squeeze out too much water. The paste should not be crumbly, and you should be able to form indentations with a spoon or finger.
  3. When mixing the red bean paste with sugar, the paste will become more fluid and glossy. Mix until you obtain the thickness of paste that you desire.
  4. The completed red bean paste should look like this.
  5. Guide to making steamed buns
  1. Ensure that your yeast is active. It should foam like shown in the picture.
  2. After kneading in the mixer (or by hand), the dough should be smooth and should not be sticky. Shape it into a ball and allow it to rest.
  3. It should triple in volume.
  4. Knead the dough gently and divide the dough into 14 equal pieces (my pieces are not very equal). This dough handles very easily.
  5. Enclose the red bean paste filling by forming little pleats and pinching the dough towards the centre. This forms the base.
  6. Ensure that your buns are spaced at least 2 – 2.5 inches apart as they will expand when they steam.

So now you are ready to try to make your own steamed buns!

Steamed Red Bean Buns (Tau Sar Pau)
 
A recipe on making steamed red bean buns (tau sar pau) from scratch! Make your own red bean paste (tau sar) and sweeten it according to your taste.
Recipe type: Bread
Cuisine: Chinese
Serves: 14
Ingredients
Red Bean Paste (Tau Sar)
  • 1 cup of red beans
  • ¾ to 1 cup of sugar
Dough
  • 3 tbsp sugar
  • ⅞ cup warm water
  • 11/2 tsp dried yeast
  • 3 cups Hong Kong flour
  • 11/2 tsp baking powder
  • 1 tbsp shortening
Instructions
Red Bean Paste
  1. Soak red beans in water overnight. The water should cover the red beans.
  2. Pour away the water used to soak the red beans.
  3. In a large pot, add the soaked red beans. Add water to the pot - it should be about 1 inch above the red beans.
  4. Bring to a boil over a medium flame and turn off the flame. Allow it to stand for about 10 minutes. Pour away the hot water.
  5. Fill the pot once again with water till about 1 inch above the red beans.
  6. Bring to a boil and then turn the flame down.
  7. Simmer for about 1 hour, or until red beans are soft.
  8. Sieve the red beans and water into a large bowl.
  9. Using a metal spoon, mash the red beans in the sieve, leaving only the red bean skins behind. Repeat till all the red beans are mashed and skins removed. Wash the sieve.
  10. Sieve the red bean paste and water through the sieve to remove any bits.
  11. Using a cheesecloth bag, squeeze out excess water from the red bean paste and water mixture.
  12. Put the paste into a metal pot over medium heat. Add sugar (according to your taste) to the paste and stir in a back and forth motion till the sugar dissolves. The paste will become more fluid.
  13. Continue to stir in a back and forth motion until you reach the desired thickness for your paste.
  14. Optional: If you'd like your paste to be more glossy, you can fry your red bean paste in 1-2 tbsp of vegetable oil after the last step.
  15. Allow red bean paste to cool to room temperature. Keep in fridge until required.
  16. Shape red bean paste into 1 oz balls and set aside till dough is ready.
Dough
  1. In a bowl, dissolve sugar in warm water.
  2. Sprinkle yeast on the surface of the water and allow it to foam (about 10 minutes).
  3. Meanwhile, sift flour and baking powder into the bowl of a standing mixer prepared with a dough hook.
  4. Add shortening.
  5. When the yeast mixture foams, add it to the flour mixture in the mixer bowl.
  6. Knead the dough using the mixer for about 5-7 minutes, until it is smooth and does not stick. (If using hands, this step takes about 10-12 minutes).
  7. Remove dough from the mixer bowl and shape it into a ball.
  8. Place in a large clean bowl and cover with cling wrap.
  9. Allow it to rise in a warm place till it triples in volume.
  10. Remove from the bowl and knead it slightly to remove some air.
  11. Divide the dough into two portions and roll each portion into a log.
  12. Divide each log into 7 equal pieces.
  13. Shape each piece with your palm till it is a 10-12cm in diameter circle.
  14. Add a ball of red bean paste to the centre. Enclose the red bean paste by forming neat pleats and folding towards the centre. Place the folded side on a piece of small baking paper.
  15. Repeat till all the dough and paste has been used up.
  16. Let the buns stand for about 15 minutes before arranging them in a bamboo steamer. The buns should be about 2 inches apart as they will expand.
  17. Steam for 10 minutes.
  18. Serve hot or cool to room temperature and freeze.

Pumpkin Huat Kueh (Steamed Pumpkin Cake)

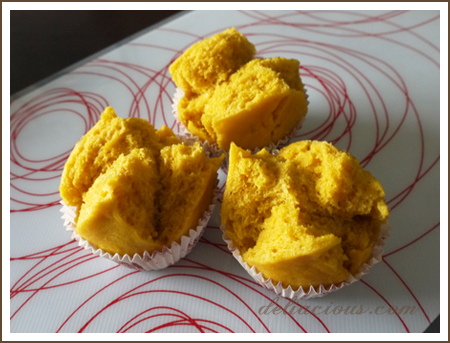
I realised I had some pumpkin left in the fridge today and hence decided to steam it up to make pumpkin huat kuehs for my little girl. Huat Kueh, translated literally, means “prosperous cake”. Some people believe that if it rises and breaks open like a smile (as shown in the photo above), you will have good luck. I believe in none of that but that doesn’t stop me from making some yummy, oil-free steamed cakes for my little girl. They are slightly more troublesome to make than traditional muffins, but they have a nice soft chewy texture.

Most pumpkin huat kueh recipes you see out there uses coconut milk, because the combination of coconut milk and pumpkin is absolutely aromatic. In order to make this more healthy and child-friendly, I chose to use whole milk instead of coconut milk.

Pumpkin Huat Kueh
 
Author:
Serves: 10
Ingredients
Starter dough
  • 50g Hong Kong Flour
  • 50ml water
  • 1 tsp instant yeast
Batter
  • 200g pumpkin, steamed and pureed
  • 100ml whole milk
  • 1 egg
  • 120g brown sugar
  • 320g Hong Kong flour
  • 2 tsp baking powder
Instructions
  1. Mix starter dough ingredients in a bowl and set aside for 30 minutes.
  2. Sift together flour and baking powder and set aside.
  3. In a large mixing bowl, combine pureed pumpkin, milk, eggs and brown sugar.
  4. Add in sifted flour and baking powder and mix well.
  5. Finally, add in proofed starter dough and mix well. The mixture will be sticky.
  6. Set a steamer over boiling water. Fill muffin cups almost to the top with the mixture.
  7. Steam over rapid boiling water for 15 minutes.
Notes
Adapted from http://sakurambokitchen.blogspot.sg/2007/07/huat-kueh-pumpkin-durian-sweet-potato.html

This post is shared at Saturday Dishes Pumpkin.