Chocolate Banana Layered Cake

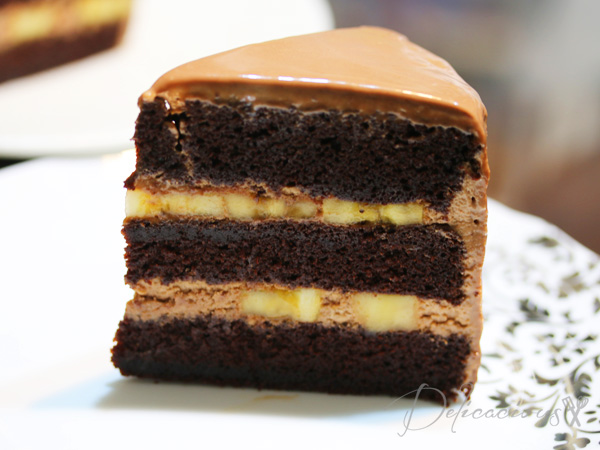
chocolate banana layered cake

This was my birthday cake. And yes, I baked it myself. For the first time in forever (you can tell that my daughter is still having Disney Frozen fever), I baked myself a birthday cake. It was a spur of the moment decision really. I bake my childrens’ birthday cakes, I bake my husband’s birthday cake, I even bake my friends’ children’s’ birthday cake, why shouldn’t I bake my own birthday cake? My hubby didn’t agree though – he said I deprived him of a chance of buying me a cake. 🙂

So happy me got to bake TWO birthday cakes for myself. Well, theoretically this is the birthday cake but I had a staff workshop in the morning and baked a simpler chocolate banana cake (the non-layered type) for my colleagues. But let’s talk about this cake instead. I love the Secret Recipe chocolate banana cake. On the rare occasions that I’m there, that’s the cake I always order. Unfortunately, it’s expensive. Well, most cakes are these days. And so when I saw The Baking Biatch’s Chocolate Banana Cake, I decided to try my hand at making the cake. I didn’t end up using her recipe, as I wanted a more chocolatey cake (her sponge cake is a lighter chocolate cake with less cocoa content), but inspiration came from there.

Essentially, I used my favourite Chocolate Devil’s Food cake (recipe modified from Munira’s chocolate devil food cake) as a base, filled the in-between layers with chocolate whipped cream and bananas, and covered the cake with chocolate ganache. I used Valrhona chocolate for this cake (which really made a difference), but you can use your favourite good quality chocolate. For the many who have been asking for the recipe, here goes…

Chocolate Banana Layered Cake
 
Serves: 1 8 inch cake
Ingredients
Chocolate Cake
  • 1 cup cake flour
  • 1 cup plain flour
  • ¾ cup dutch-processed cocoa powder
  • 1 tsp baking powder
  • 2 tsp baking soda
  • 1 tsp salt
  • 1⅓ cup Demerara sugar
  • 2 eggs (room temperature)
  • ¾ cup vegetable oil
  • 1 cup buttermilk (Add 1 tbsp white vinegar and add milk to form 1 cup)
  • 1 cup hot coffee (1 tsp instant coffee granules dissolved in hot water)
  • 1 tsp vanilla extract
Chocolate whipped cream
  • 85g couverture chocolate (dark or milk, your preference)
  • 1 cup whipping cream
Chocolate ganache
  • 120g dark chocolate couverture (I used a mix of milk and dark couverture)
  • 1 cup whipping cream
To assemble
  • Simple sugar syrup (optional)
  • 3-4 large bananas, sliced
Instructions
Chocolate Cake
  1. Preheat oven to 170°C.
  2. Grease and line three 8 inch cake pans (you can use one large one and split the cake up as well)
  3. In a large bowl, sift together the dry ingredients.
  4. In another large bowl, combine the wet ingredients.
  5. Add the wet ingredients to the dry ingredients and using a whisk and starting from the centre, slow combine till you get a smooth batter.
  6. Divide among the cake pans and bake for 20-25 minutes or until a tester inserted in the middle comes out clean.
  7. Turn the cakes out of the pans and cool on racks completely.
  8. Wrap cakes in cling wrap and chill for 30 minutes or more to allow for easier frosting.
Chocolate whipped cream
  1. Melt chocolate in the microwave or in a double boiler. Allow it to cool for 15 minutes or so.
  2. Meanwhile, whisk whipping cream in the bowl of a standing mixer till it forms stiff peaks. (I chill the bowl and the whisk before use)
  3. Add ⅓ of the whipped cream to the melted chocolate to lighten it.
  4. Then pour the chocolate mixture into the remaining whipped cream and fold gently to combine.
Chocolate ganache
  1. In a small pot, heat whipping cream till bubbles form at the side. Do not allow it to boil.
  2. Pour hot whipping cream over chocolate and whisk till chocolate melts.
  3. Allow it to cool slightly and thicken before use.
To assemble
  1. Spray the first layer of cake with sugar syrup (optional)
  2. Spread whipped cream on the cake and top with sliced bananas
  3. Top with more whipped cream and place the second layer of cake above it.
  4. Add whipped cream, bananas and more whipped cream.
  5. Top with the third layer of cake.
  6. Ice the top and sides of the cake with more whipped cream.
  7. Place in the fridge to chill till firm.
  8. While the cake is chilling in the fridge, you can prepare your ganache.
  9. Place chilled cake on a rack.
  10. Pour ganache over the cake and allow it to flow down the sides.
  11. Chill cake till ganache sets.
  12. Slice, serve and enjoy.


Really Good Banana Muffins

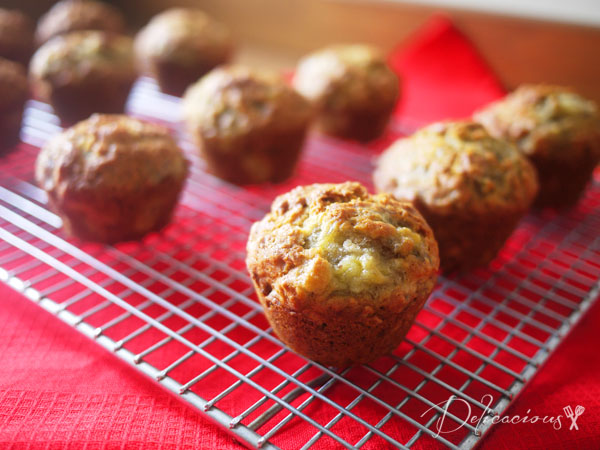
banana muffins

How many recipes does one need for banana muffins? Just one really. A really good one. I’ve tried more than a couple of banana muffin recipes in the past years and this banana muffin recipe is definitely a keeper. There are a few tricks for good banana muffins. Firstly, make sure you use over-ripe bananas. When you have a bunch of bananas that are over-ripe and you don’t feel like baking just yet, peel them and freeze them for use later. Don’t throw them away! Personally, I find that the local variety “red meat bananas” make the best banana muffins/cakes/breads. My grandma calls them “ang bah jio”. Second trick – do not over mash the bananas. This gives the muffins a better texture. Lastly, use brown sugar for a more fragrant muffin.

Really Good Banana Muffins
 
Serves: 12
Ingredients
  • 2 cups plain flour
  • ⅔ cup brown sugar
  • ½ cup toasted coarsely chopped walnuts
  • ½ tsp baking soda
  • ½ tsp salt
  • 4 large ripe bananas
  • 2 eggs
  • 3 oz unsalted butter, melted
  • ¼ cup buttermilk
  • 1 tsp vanilla extract
Instructions
  1. Preheat oven to 180°C. Spray a 12 cup muffin tray with non-stick baking spray and centre an oven rack.
  2. In a large bowl, combine flour, sugar, walnuts, baking soda and salt.
  3. In a separate bowl, coarsely mash the bananas.
  4. Add beaten eggs, butter, buttermilk and vanilla and stir to combine.
  5. Add wet ingredients to the dry ingredients and gently fold (I use a whisk) to combine.
  6. Fill each muffin cup till ¾ full.
  7. Bake for 15-20 minutes, or until muffin tops are golden brown and a tester comes out clean.
  8. Cool to room temperature.

Nutella Swirled ChocoNana Muffins

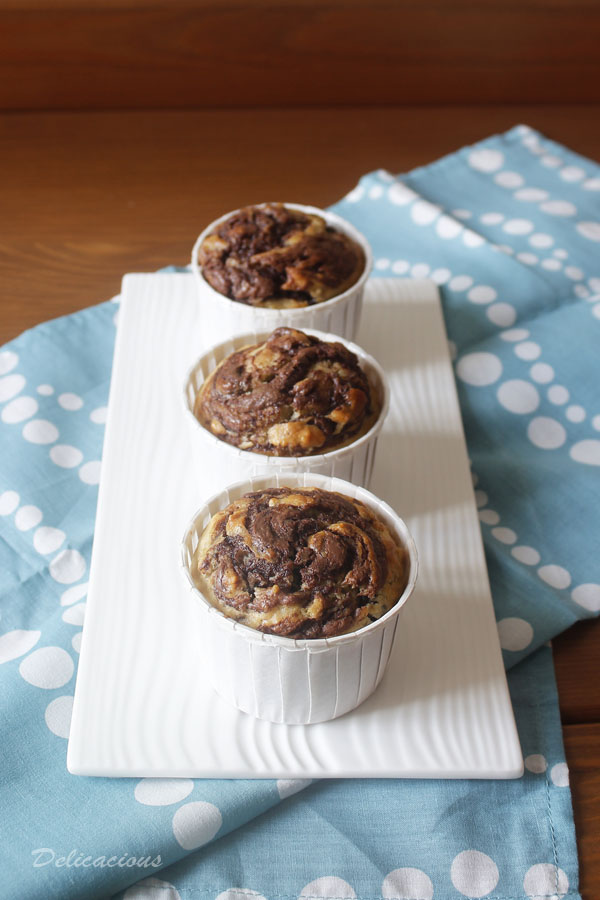
Nutella swirled choco nana muffins

I was mulling over what to bake for breakfast and asked my husband if he preferred oatmeal bread or honey wholewheat bread. “Chocolate Banana bread!” my little one chimes in. Chocolate banana bread? Now where did that come from! She has never tried chocolate banana cake, bread, muffin or anything of that combination. It did sound like a good idea though. After all, I really like chocolate mousse cake with banana slices.

So breakfast was decided. Chocolate banana bread. Only that a loaf of bread sounded a little boring. “How bout chocolate banana muffins instead?” I asked the little one. She nodded in agreement. I never thought that my 2.5 y.o will be deciding the breakfast menu at such a young age!

I set out to bake Chocolate Banana muffins. And then I had a brainwave. My husband loves nutella. How bout topping each muffin with just a little nutella? Brilliant isn’t it? I would think so because the muffins were so good. I love the texture, the flavour, the chunky banana and the bits of chocolate AND the nutella. You would love it too, if you try it!

Nutella Swirled ChocoNana Muffins
 
Author:
Serves: 8
Ingredients
  • 2 cups plain flour
  • ½ cup sugar
  • ½ teaspoon baking soda
  • ½ teaspoon salt
  • 3 ripe bananas, mashed coarsely
  • 2 large eggs, beaten
  • 3 ounces unsalted butter, melted and cooled
  • 1 teaspoon vanilla extract
  • ¼ cup buttermilk
  • ½ cup semi-sweet chocolate chips
  • nutella
Instructions
  1. Preheat oven 175ºC.
  2. Place 8 large standing muffin liners on a baking tray. (You can use a muffin tray as well.)
  3. In a large mixing bowl, combine flour, sugar, baking soda and salt.
  4. In a smaller mixing bowl, add eggs, melted butter, vanilla extract and buttermilk to the mashed bananas. Stir to combine.
  5. Pour wet ingredients into the dry ingredients and fold gently.
  6. Stir in the chocolate chips.
  7. Fill each muffin cup to ¾ full.
  8. Top with ½ tsp of nutella. Swirl with a toothpick or a small spatula.
  9. Bake for 20 minutes, or until a tester comes out clean.

This post is shared at these blogs.

Banana Walnut Bread

Hubby bought a huge bunch of bananas some time back, and since it’s just the two of us, most of the bananas ripened (or over ripened) before we could eat them. We froze about 8 of them in a box – over ripe bananas freeze well, without their skins of course, and are delicious in all kinds of baked goods.

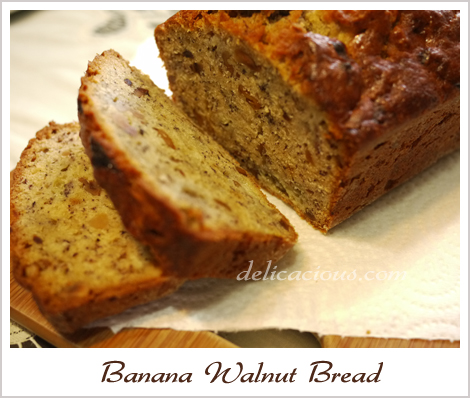
Seeing that I had some leftover walnuts from the not so recent mooncake making attempts, I decided to try a recipe from the book “The new best recipe“. The recipe is really simple because it does not require the use of a mixer. All the mixing can be done just with a wooden spoon and spatula. The results, as you can see from the picture above, is a moist, fragrant and very flavourful banana walnut bread. One of the best I’ve tasted, if I say so myself. Below is the slightly modified recipe that I used from the book.

Banana Walnut Bread
(Makes one 9-inch loaf)

Ingredients:
2 cups unbleached all purpose flour
1 cup of walnuts, chopped coarse
3/4 cup sugar
3/4 tsp baking soda
1/2 tsp salt
4 very ripe medium sized bananas (mashed)
1/4 whipping cream
2 large eggs, lightly beaten
6 tbsp melted and cooled unsalted butter
1 tsp vanilla extract

Method:

  1. Preheat oven to 350 degrees F and place an oven rack in the middle position. Grease and flour the bottom and sides of a 9 by 5 inch loaf pan.
  2. Lightly toast chopped walnuts on a baking sheet till fragrant.
  3. Whisk flour, sugar, baking soda, salt and walnuts together in a large bowl. Set aside.
  4. Mix mashed bananas, cream, eggs, butter and vanilla with a wooden spoon in a medium bowl.
  5. Lightly fold the banana mixture into the dry ingredients with a rubber spatula until just combined. Do not overmix.
  6. Scrape the batter into the prepared pan and bake till loaf is golden brown and a toothpick inserted in the centre comes out clean, about 55 minutes.
  7. Cool in the pan for 5 minutes, then transfer to a wire rack. Serve warm or at room temperature.
  8. The bread can be wrapped with plastic wrap and stored at room temperature for up to 3 days. It is best consumed on the day it is baked though.

A date with Banana Cake

I love banana cake. I love the fragrance of the banana, seeping out through moist, loose cake crumbs, and the flavour oozing out with every bite. Unfortunately, most recipes are either too dense, or too dry. That is until I came across a recipe for banana cake on Chubby Hubby’s blog. That recipe has since been the one that I use faithfully. One of the most important ingredients of banana cake is of course, the bananas. Using the right bananas is paramount to success. For me, the riper, the better. My hubby however, loves to throw away over-riped bananas. He claims that they’re rotten and fit for the trash, even though I argue that they’d be perfect for banana cakes. A couple of days ago, he threw away another bunch that I had been reserving for banana cakes. I was livid. Thankfully, he bought another bunch of bananas (fairly ripe already) the next day, and yesterday, I decided that they were ready.

banana cak