Oven-baked Crispy Lemon Wings (Whole30/Paleo friendly)

crispy lemon wings

About two weeks ago, hubby and I started on the Whole30 diet. Basically, we eat real food for 30 days, and eliminate SUGAR, dairy, legumes, grains and alcohol, as well as MSG, Careenagans and Sulphites. What do we eat then? Well, things like these mouthwatering oven-baked crispy lemon wings! The wings are excellent on their own, but when paired with homemade ranch dressing, everything goes up by a notch! They are so good, that I’ve come out of my blogging hiatus to blog about this recipe!

I used a mish mash of techniques for this recipe. Before whole30, I used to bake oven crispy wings by mixing wings with a mix of salt and baking powder, drying them in the fridge, then baking them at a very low temperature in the oven to dry the wings up further before cranking the temperature up. Since baking powder is not whole30 compliant, I can’t use this method. However, I figured that drying the wings at low temperature in the oven would still aid in bringing out the crispiness of the wings. So the basic method is this: Marinate the chicken with a dry rub, keep it in the fridge for a couple of hours. Bake the wings at low temperature before cranking it up. Remove from oven, coat with a lemon “butter” marinade and bake them for a quick 5-10 minutes. Convinced that you should bake some up for dinner? Here’s the recipe!

Oven-baked Crispy Lemon Wings (Whole30/Paleo friendly)
 
Author:
Cuisine: Paleo
Ingredients
Chicken marinade
  • 2 tbsp olive oil
  • 1 kg chicken mid-wings
  • 2½ tsp sea salt
  • ½ tsp black pepper
  • 1½ tsp garlic powder
  • 2 tsp onion powder
  • zest of 1 lemon
Lemon "butter"
  • 80ml of ghee (1/3 cup)
  • 60 ml olive oil (1/4 cup)
  • 3 garlic cloves, minced
  • juice of 1 lemon
Instructions
  1. Mix wings with olive oil.
  2. Combine salt, pepper, garlic powder, onion powder and lemon zest together.
  3. Mix the dry rub with coated wings and place them in a sealed ziplock bag. Refrigerate for 4-8 hours.
  4. Preheat oven to 120C. Place wings on a greased rack (with another tray below it) and bake for 30 minutes.
  5. Turn up the oven temperature to 230C. Bake for another 30 minutes.
  6. Meanwhile, in a small saucepan, combine ghee and olive oil over medium heat.
  7. Once the ghee has melted, add in the garlic and stir for a minute or so.
  8. Pour in lemon juice, stir to combine and remove from heat.
  9. When wings are done, remove from the oven and brush generously with the lemon "butter". Return to the oven for 5 minutes. Flip wings over and brush with more lemon "butter" and bake for another 5 minutes. Serve with homemade ranch dressing.
Notes
Ranch dressing recipe can be found on the Whole30 site:
https://whole30.com/2014/08/mayo-ghee-sauces/
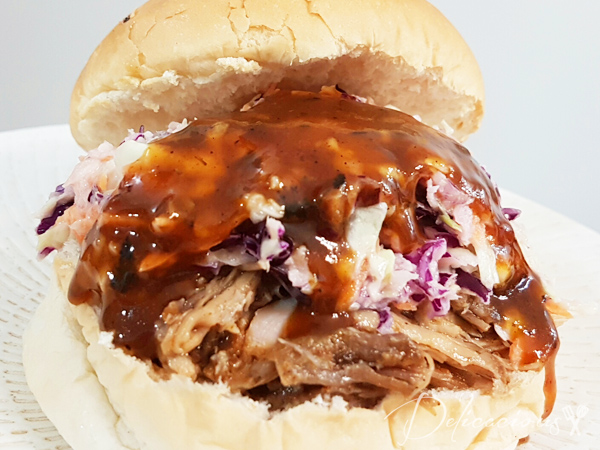


Instant Pot Beer Braised Pulled Pork

Instant Pot Beer braised pulled pork

After a few crazy months of renovations and managing the house move, it’s finally over and I can START COOKING! The biggest addition to the new kitchen is the Instant Pot. My friend, who blogs at Still Feeling Peckish, a low carb blog, raved about the pot on her facebook page and I was sold. I happened to be in the US, and so I crazily lugged one back to Singapore, thinking that I could use my existing transformer. Unfortunately, the transformer started smoking and we realised that we had rather “cleverly” used a 250W transformer on a 1000W pot. Thank goodness no one was harmed and the new house remained intact. Found someone selling a brand new 3000W transformer (yes, overkill I know) on Carousell for a good price, bought it and I CAN FINALLY USE MY POT!!!

The first thing I made after the water test was some garlic lemon chicken, but they were not blog worthy enough. The second thing I made, to feed my super hungry CG mates (11 adults who can eat like 20 adults) were these pulled pork burgers. And mind you, these are not your ordinary pulled pork burgers. The pork was cooked in Irish Ale (a dark beer would do as well). They are absolutely delish, and the best part, the pulled pork took under an hour and a half to prepare. Can you imagine? Melt in your mouth goodness in just an hour and a half? I love the instant pot!

If you are reading this post, all you want is probably the recipe, and so I’ll stop raving about the burgers and just give you the recipe. Try it. You’d be amazed too.

Instant Pot Beer Braised Pulled Pork
 
Author:
Ingredients
  • 1 tbsp salt (use more if your cajun rub doesn't include salt)
  • ½ tsp ground black pepper
  • 3 tbsp cajun seasoning (I use NOMU's)
  • 1.8kg (4 lbs) pork shoulder butt (cut into 400g slabs)
  • 5 cloves of garlic, smashed with skins on
  • 1 cup of good ale or dark beer
  • ½ cup ketchup
  • ⅓ cup brown sugar
  • 3 tbsp Worchestershire sauce
  • 2 tbsp Dijon mustard (I didn't use it though)
Instructions
To make pulled pork
  1. Combine salt, pepper and cajun seasoning
  2. Rub it all over the pork pieces.
  3. Wrap it up in cling wrap and allow it to sit in the fridge for 4 hours or overnight.
  4. Set the Instant Pot (IP) to saute mode.
  5. Brown each pork piece and set aside.
  6. Click cancel, and select the manual mode on the IP and set the timer to 45 min.
  7. Place the pork pieces back into the pot, and scatter the garlic around it.
  8. Pour in the ale/beer.
  9. When the timer is up, allow the pot to release pressure naturally for about 15 min.
  10. Remove the pieces of pork carefully and set aside.
  11. Set pot on saute mode. Add ketchup, brown sugar and Worchestershire sauce. Stir and allow it to reduce slightly.
  12. Meanwhile, pull the pork with two forks. Add some of the reduced sauce to the pork and mix.
  13. Thicken the remaining sauce in the pot by mixing two tbsp of cornstarch with some water, and adding the cornstarch mixture to the sauce. Let it boil and slowly thicken. When you reach your required consistency, turn off the pot and pour out the BBQ-beer sauce.
To-assemble
  1. Toast some burger buns, pile on the pulled pork, drizzle the thickened sauce over and top the pork with some slaw. Tuck in!
Notes
Adapted from: http://www.foodnetwork.com/recipes/dave-lieberman/beer-braised-bbq-pork-butt-recipe.html


Claypot Chicken Rice

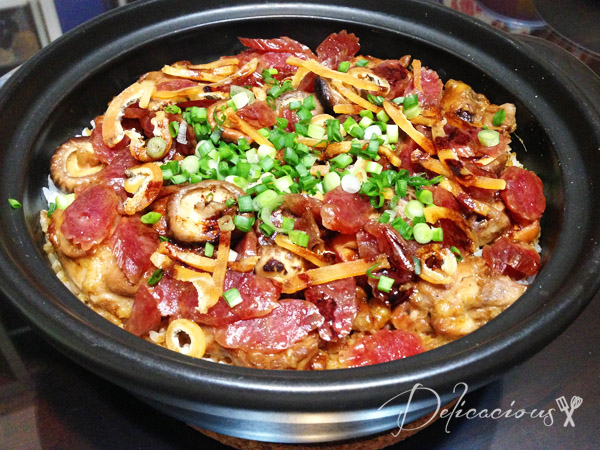
claypot chicken rice | Delicacious

Dinner at home is typically 三菜一汤 (three dishes and one soup) on weekdays but lately, with the addition of an infant, we have been trying to simplify dinner. One dish meals seem to be the way to go and this claypot chicken rice is one of our favourite Chinese one dish meals. It uses simple ingredients, is fast to prepare (start to finish is just slightly more than an hour) and is definitely satisfying. Of course, it can’t beat claypot rice that is cooked over charcoal fire but this definitely comes close. My hubby loves scraping up the slightly charred crispy rice bits at the bottom of the claypot!

Here are some tips for preparing claypot chicken rice. Firstly, cooking times with a claypot would vary with the size of claypot and the fire used. I’ve given guidelines that work for my claypot in my recipe but you may wish to adjust the timing after you’ve tried the recipe for the first time. For the claypot, I’ve used a Tanyu flat bottom claypot, but you can use any seasoned claypot. Noobcook has some good advice on preparing a claypot for its first use here. I’ve adjusted the liquid amount for this recipe so that the rice is moist but not soggy. If you prefer the rice to be drier, you may wish to reduce the liquid amount further. Lastly, whenever possible, use a low sodium chicken stock. If using chicken stock cubes/packaged chicken stock, it would be advisable to use half water and half stock as the stock is usually rather salty.

And now for the recipe…Continue Reading

Steamed Clams with Sake and Soy

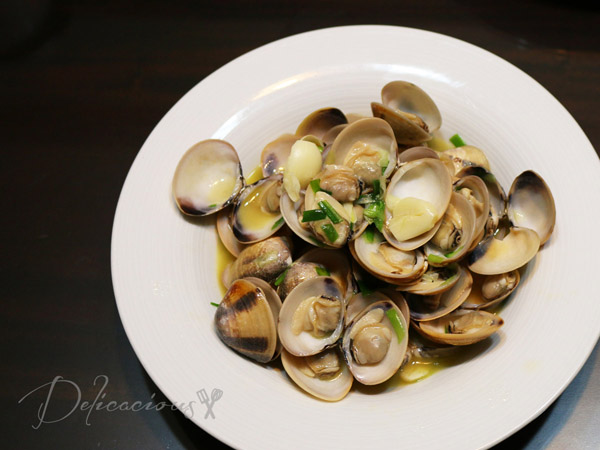
steamed clams with sake and soy

Doesn’t this photo of these succulent clams make you hungry? If you cannot resist ordering vongole everytime you see it on the menu, you must check out the very simple recipe on The Best Blog Recipes. That’s right! I’m a guest contributor to the blog from February to July. While you are there, check out the other fantastic recipes too!

Kong Ba Pau (Braised pork belly bun)

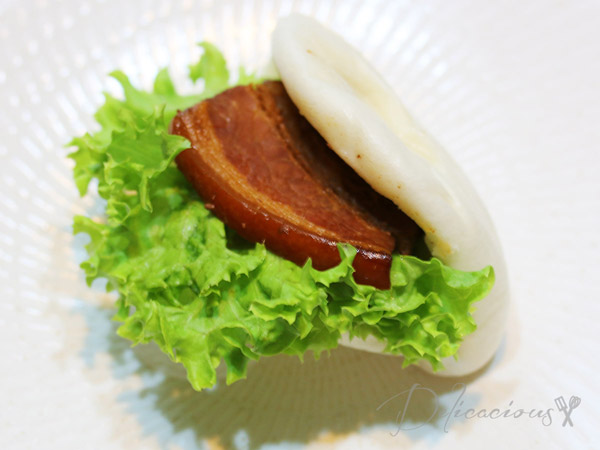
kong ba pau

Pork Belly. One of my husband’s greatest loves. He loves them served up on the Korean BBQ, in thin strips in steamboat and definitely, he loves them served up this way, in a bun. There are few people I know, who would willingly turn away Kong Ba Pau. There may be the initial hesitation over the layers of fats but the aroma of the braised pork belly will soon win you over. If it makes you feel better, pick the least fatty piece of pork belly and add an extra serving of lettuce. Now that should ease your guilty conscience a little, doesn’t it?

I do not naturally gravitate towards pork belly, but I do enjoy Kong Ba Pau occasionally. In the last two weeks, I’ve prepared this dish not once, but twice for gatherings with family and friends. The first time preparing it, the pork belly was a little drier than I would have liked it, because dear hubby kept the pork braising for 40 minutes (YES 40 minutes) longer than I asked him to. He felt that it was not “braised enough”. He quickly learnt that in cooking, longer does not neccessarily mean better. The second time round, the pork belly was perfectly braised and judging from the response at the dinner table that night, it was well received.

Even though the dish may sound tricky to prepare, it is really very simple. The only trick is to marinate the pork belly well. By well, I mean marinate it for a good 20 to 24 hours. That will ensure that all the flavourings are thoroughly absorbed into the pork belly. Most people preparing this dish will choose to use a large slab of pork belly, braise it and then slice it up for the buns. That works fine. For me, I used frozen sliced pork belly (because that was available readily), braised it for a slightly shorter time than I would a slab of pork belly and saved myself the trouble of slicing. The sliced pork belly also absorbs the marinate better. Both methods work fine – just do whichever works better for you.

Kong Ba Pau (Braised pork belly bun)
 
Serves: 15
Ingredients
  • 2 pieces of pork belly or about 500g of sliced pork belly
  • 2 sticks of cinnamon
  • 2 star anise
  • 15 cloves
  • 10 pieces of garlic, smashed with its skin
  • 10 pieces of shallots, skin removed
  • 2 tbsp oyster sauce
  • 2 tbsp dark soy sauce
  • 2 tbsp light soy sauce
  • 1 tbsp shao xing cooking wine
  • 2 tbsp of oil
  • 2-3 pieces of small rock sugar
To serve
  • Coral lettuce
  • Leaf bun
Instructions
  1. Wash, clean and dry pork belly.
  2. In a large bowl, marinate pork belly with all the remaining ingredients except the oil and rock sugar.
  3. Cover and keep refrigerated for 18 -24 hours.
  4. In a large claypot with a flat bottom, heat 2 tbsp of oil.
  5. Add the rock sugar and saute the pork belly for about a minute on each side. (If using sliced pork belly, you can skip this step.)
  6. Add in the marinate and 4 - 5 tbsp of water.
  7. Allow the pork belly to simmer in the marinate for about 30 - 40 minutes.
  8. Remove when meat is tender.
  9. Slice and serve hot with lettuce and bun.

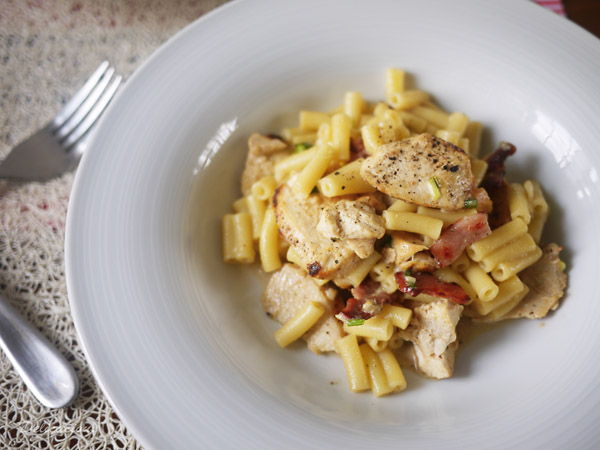
Bacon and Chicken Alfredo Pasta

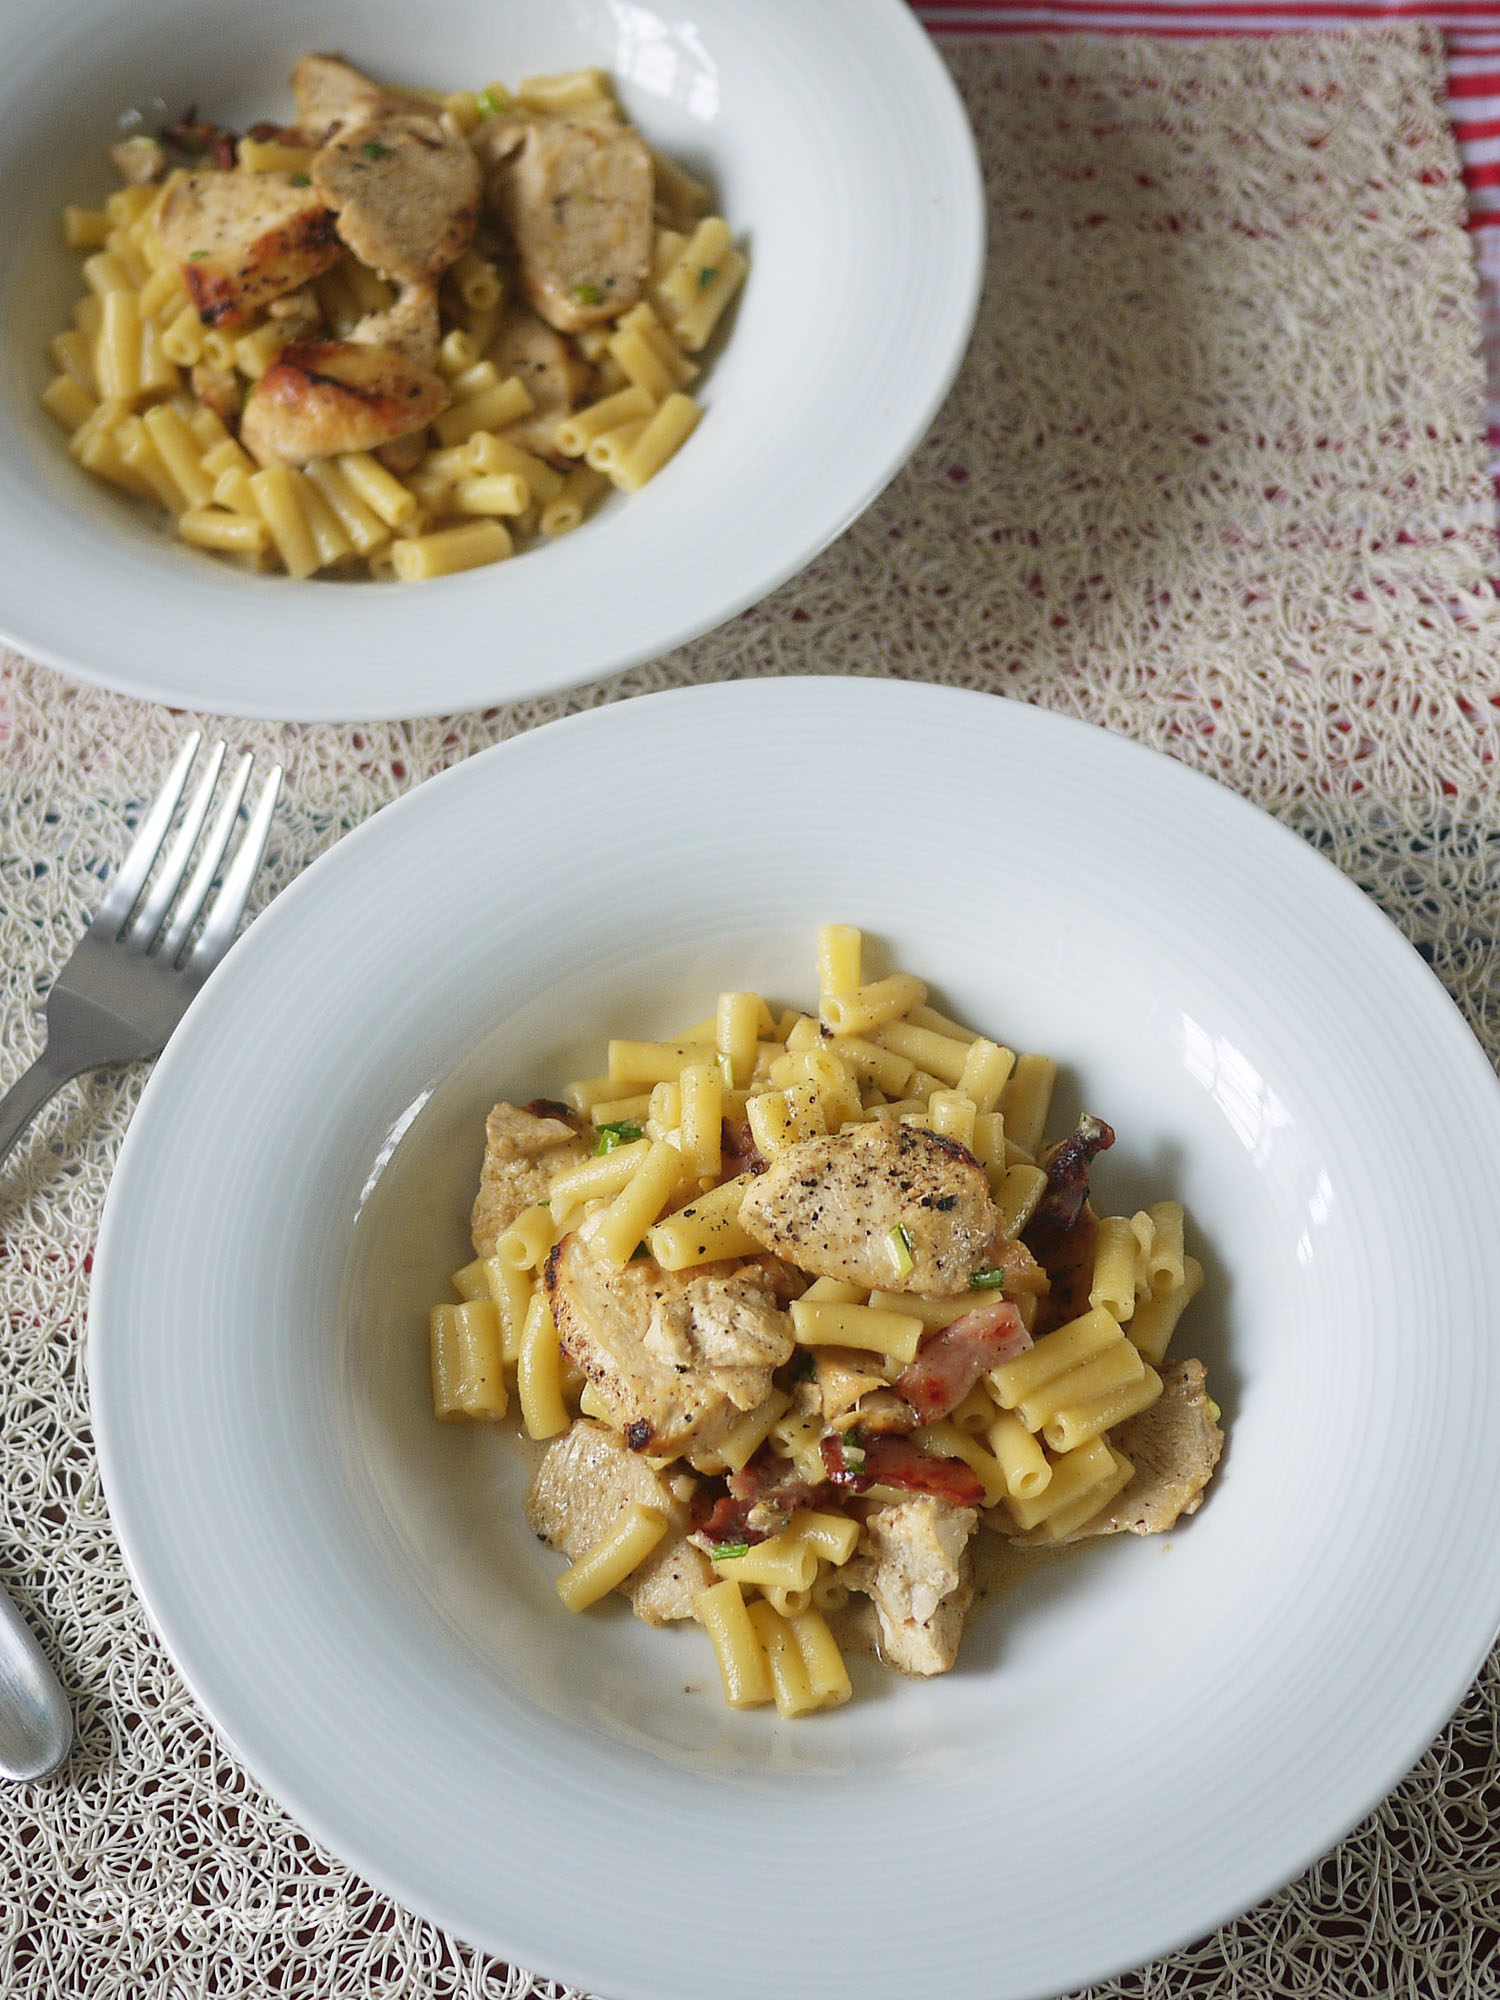
Bacon and Chicken Alfredo Pasta

Chicken alfredo pasta is a staple that one sees at almost all pasta joints. If you walk along the pasta aisle in a supermarket, I can almost guarantee that you will find a bottle of ready-to-go alfredo sauce. In fact, many bottles of it, and different brands of it. It is THAT popular. I distinctively remember the day my mom bought a bottle of alfredo sauce and prepared pasta with it. I was young; my mom was working and didn’t have much time for meal preparations. Ready-made sauces were the best bet right? Wrong…. The sauce was floury, gloopy and tasted really bad. Now, I’m sure there are better tasting alfredo sauces out there now, but that experience was enough to stop me from ever, ever, ever buying a bottle of alfredo sauce. Why would I want to do it anyway when preparing alfredo sauce is so simple and quick?

Bacon chicken alfredo

Continue Reading

Salmon and Corn Chowder

Salmon and Corn Chowder | Delicacious

Are there days where you just crave a bowl of hot soup for dinner? I do so occasionally, especially on cold, rainy days. Or sometimes, it’s just me being lazy and trying to figure out a quick fix for dinner. Whatever your reason for wanting soup for dinner, this salmon and corn chowder is sure to satisfy.  It is hearty, healthy (I use low fat milk instead of cream), and tasty, and goes perfectly with biscuits or soft dinner rolls. Serve this with my bacon, parmesan and scallion scones and you will definitely have very happy people at the dinner table.

My little one came into the room while I was typing this post, saw the photo and exclaimed, “Oh I remember this soup! It’s full of corn, mushrooms and fish. It’s yummy! I like it.” There you go. Even two and a half year olds like it. I am sure you would too.

Salmon and Corn Chowder
 
Serves: 4
Ingredients
  • 2 tablespoons olive oil
  • 1 stalks celery, cut into ½-inch slices
  • 1 medium potato, cut into 1-inch cubes
  • ¼ cup of chopped scallions
  • 1½ cups corn kernels
  • 4 cups chicken stock
  • 1 cup low fat milk
  • Zest of 1 lemon
  • ½ tsp dried dill
  • 500g boneless salmon fillets, cut into 2-inch pieces
  • 1 tbsp lemon juice
  • salt and pepper
  • cornstarch and water for thickening (optional)
Instructions
  1. Heat the olive oil in a soup pot or dutch oven over a medium flame.
  2. Sauteed celery and potato for about five minutes.
  3. Stir in corn, scallions and stock.
  4. Bring to a boil, then reduce flame to low and simmer covered for 12 - 15 minutes.
  5. Stir in milk and lemon zest.
  6. Add salmon and simmer for 3 - 5 minutes.
  7. Stir in lemon juice.
  8. Season to taste with salt and pepper.
  9. Thicken with cornstarch water if preferred.
  10. Serve hot.
Notes
Adapted from Epicurious

I’m sharing this post at some of these blogs here.