Tis the season for the fruitcake…

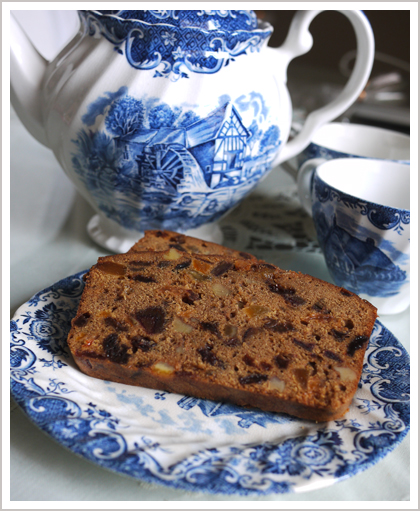
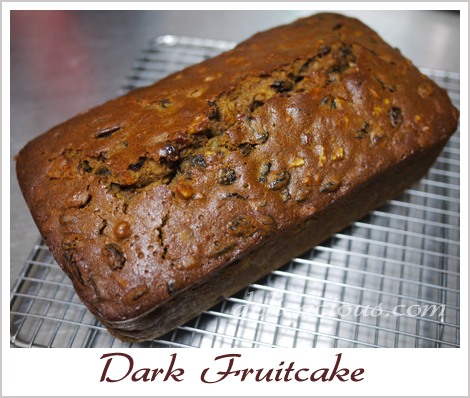
My mother surprised me a couple of weeks back by requesting that I bake her a fruitcake this year. She does not have a very sweet tooth, and hardly ever requests for any baked goods and so this was indeed surprising. I didn’t even think she liked fruitcakes! Anyway, it was too late to start soaking fruits in brandy then, so I decided to make one that didn’t involve any soaking of fruits. The cake however, should be stored for a couple of weeks before eating. As I type this, my loaf of fruitcake is sitting in the refrigerator, nicely wrapped in plastic and foil. I know that fruitcakes are supposed to be able to keep at room temperature for a month or more, but seeing how my kitchen seems to be a war zone for ants lately, I am not taking any chances.

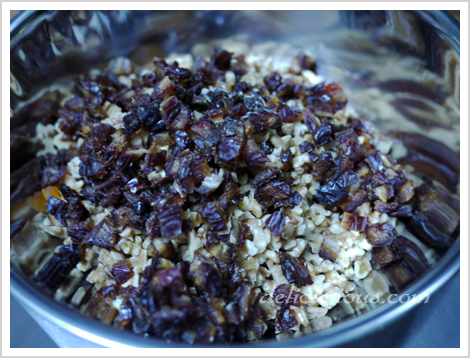
The amount of fruit and nuts used for this recipe is rather phenomenal. All that fruit and nuts in the photograph above yielded two 9 X 5 inch loaves. The fruitcake turned out nicely after baking with the aroma of brandy wafting through the oven doors. We finally cut the cake up a month later and boy was it lovely. Best enjoyed with a fragrant cup of English tea.

Dark Fruitcake
(yields two 9 X 5 inches loaves)
Recipe adapted from Joy of Cooking

Ingredients:
3 cups plain flour
1 tsp baking powder
1/2 tsp baking soda
1/4 tsp salt
1 tsp ground cinnamon
1 tsp ground nutmeg
1 tsp ground all spice
4 oz unsalted butter, at room temperature
2 cups packed dark brown sugar
6 large eggs
1/2 cup molasses
Grated zest and juice of 1 orange
Grated zest and juice of 1 lemon
1/2 cup brandy
2 1/2 cups diced mixed fruits
2 cups coarsely chopped walnuts
1 1/2 cups chopped dates
1 1/2 cups dried golden raisins
1 cup chopped dried apricots

Method:

  1. Preheat the oven to 300ºF. Grease two 9 X 5 inch loaf pans and line the bottom and sides with parchment paper.
  2. In a large bowl, sift together flour, baking powder, baking soda, salt and all the ground spices.
  3. Using a standing mixer, beat butter till creamy. Add in dark brown sugar and beat till creamy and lightened in colour and texture, 3 to 5 minutes.
  4. Beat in one egg at a time, scraping the sides of the bowl as necessary.
  5. Beat in molasses, lemon and orange zest and juice.
  6. On low speed, add in the flour mixture in 3 parts, alternating in 2 parts with the brandy.
  7. Finally, stir in the mixed dried fruits using a spatula.
  8. Scrape the batter into the two pans and spread evenly.
  9. Bake until a toothpick inserted in the centre comes out clean, about 1 1/2 hours. If the cake gets too dark on top, tent it loosely with foil for the last 30 – 45 minutes.
  10. Let cool in the pan on a rack for 1 hour.
  11. Invert the cake and remove the liner and let it cool the right side up on a rack.
  12. When totally cool, wrap cake with plastic wrap followed by foil.
  13. Cake are recommended to be stored for 3 – 4 weeks before serving.
Chocolate Pear Pudding Cake

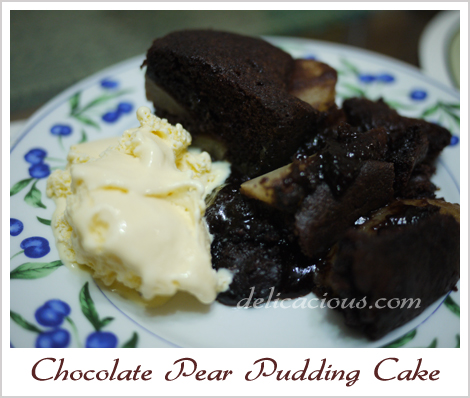
Ever had those days where you needed a dessert but had too little time? Well, yesterday was one of those days. Hubby and I had a wedding to attend in the afternoon but were also invited to dinner at a lovely couple’s place. Determined to bring along something home-baked for dessert and so started browsing through my collection of recipe books in the morning. I decided to try something from Nigella Express, a cookbook I rarely used. I had but one “small” problem. The recipe called for canned pears and we had none. Canned pears are not very common around here and I knew that I could probably only find it in the better supermarkets. I decided that I’d grab the pears after the wedding and attempt to finish the dessert in the short amount of time I had between the wedding and the dinner. This will definitely put Nigella Express to the test – could it deliver good food, fast?

I managed to find the pears in a decent supermarket after the wedding and proceeded home to start on the cake. I finished the preparations in about 20 minutes (my hubby helped to grease the pan and line the pears in the pan). The baking took another 30 minutes. The results? A delicious moist chocolate pudding cake that our host couple and their children (and ourselves of course) enjoyed. Definitely a recipe worth keeping.

Chocolate Pear Pudding Cake
(Makes one square cake, 8″ X 8″)
Adapted from Nigella Express

Ingredients:
1 large can pear halves in juice (About 465g drained weight)
3/4 cup sugar
3/4 cup + 1 tbsp plain flour
1/4 cup cocoa (dutch-processed)
5 oz unsalted butter
1 tsp baking powder
1/4 tsp baking soda
2 eggs (room temperature)
2 tsp vanilla extract

Method:

  1. Preheat oven to 400ºF. Grease an 8 inch square pan with butter.
  2. Drain pears and arrange them in the base of the dish.
  3. In a food processor, blitz butter and sugar till smooth. Add in eggs, roughly beaten and vanilla extract and blitz till combined.
  4. Lastly, add in flour, cocoa, baking powder and soda and blitz till you have a soft and smooth batter.
  5. Spread the batter over the pears and bake in the oven for 25 – 30 minutes.
  6. Let it stand for 5 to 10 minutes and then cut into 9 slices. Serve with chocolate sauce or vanilla ice-cream.

Tip: To get a gooey molten centre in the cake, do not overbake!

Christmas Kugelhopf

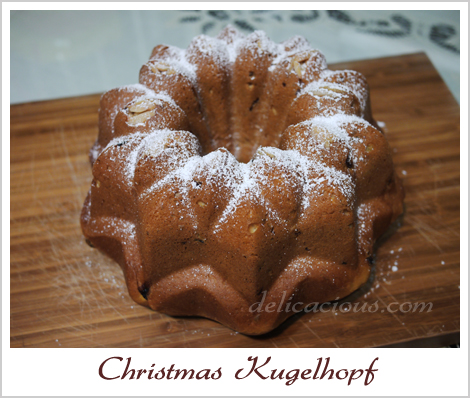
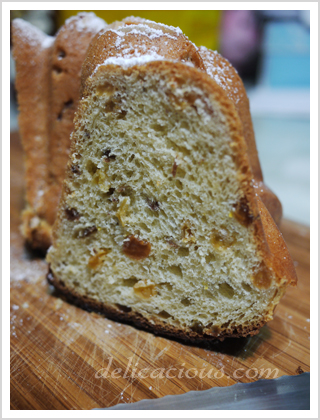
I really wanted to try to bake one of the popular Christmas breads this year. After flipping through a few recipe books, I initially settled on the one from Joy of Cooking. Something went wrong however, during the mixing process. The dough just didn’t seem to come together sufficiently for me to shape it (or knead the raisins) into it. It just felt wrong. Not wanting to waste any more time or raisins, I decided to dump that batter and try again with another recipe. This time, it worked perfectly. The result? A lovely sweet bread filled with raisins and a wonderful reminder of Christmas. The icing sugar on the top of the bread is optional but it looks so Christmasy so why not?

I didn’t have a kugelhopf pan but figured this star bundt would work as well. Nordic Ware makes such great bundt pans. They only need slight greasing and they hardly ever stick. Not to mention they ensure that your cakes/breads bake evenly. And no, I’m not paid to do a promotion for them here. It’s just that good things are worth sharing.

Kugelhopf
Fills a 11-12 cup bundt pan
Recipe adapted from Gourmet, 2002

Ingredients:
1 1/2 tsp instant yeast
2 tbsp warm water (105–115°F)
1 cup whole milk
7 tbsp unsalted butter, cut into tablespoon pieces and softened
6 tbsp granulated sugar
3 3/4 cups all-purpose flour
1 tsp salt
2 large eggs
1 cup golden raisins
1 cup dark raisins
4 tbsp rum
1 teaspoon finely grated fresh lemon zest
1/2 oz almond slivers (for decoration)
1 tablespoon confectioners sugar (for dusting)

Method:

  1. Cover 1 cup dark raisins with just enough water in a small saucepan and bring to a boil. Drain raisins and place them in a small bowl. Add 4 tbsp of rum and let them sit for at least 4 hours or overnight.
  2. Stir together yeast and water in a small bowl and let stand until foamy, 5 to 10 minutes.
  3. Heat milk with 6 tablespoons butter and granulated sugar over low heat, stirring, until mixture is warm (105 to 115°F), butter is melted, and sugar is dissolved.
  4. Sift together flour and salt into bowl of standing mixer. Make a well in flour and add yeast mixture. Add warm milk in a slow stream, mixing at low speed with paddle attachment. Increase speed to medium and beat in eggs 1 at a time, then beat in golden raisins, dark raisins with remaining rum and zest. Continue to beat until dough is smooth and elastic, about 5 minutes.
  5. Butter kugelhopf mold or bundt pan with remaining tablespoon butter. Put 3-4 almond slivers in each depression in bottom of mold (the almonds are only decorative; you can skip them altogether if your mold has no depressions), then scrape spoonfuls of dough evenly into mold (dough will be very elastic). Cover top of mold with oiled plastic wrap and a kitchen towel and let dough rise in a warm place until it fills pan, about 2 hours.
  6. Preheat oven to 400°F.
  7. Remove towel from kugelhopf and gently peel off plastic wrap. Bake kugelhopf in middle of oven 15 minutes, then loosely cover mold with foil and continue to bake until golden and a tester inserted in center comes out clean, 20 to 25 minutes more. Cool in pan 2 minutes, then invert cake onto a rack to cool completely, about 1 hour. Dust with confectioners sugar.


Warm Chocolate Raspberry Tart

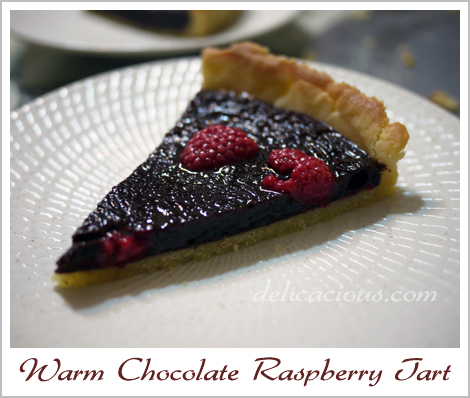
I was looking through the photo albums on my computer a few days ago and realised that there were many pictures (and recipes) that I meant to write about but never found time to. So this is catch up time. Hopefully, I will be able to put up as many recipes and pictures of the food we cooked/baked this year before the year ends.

This warm chocolate tart was seriously, hands down, the best one that I’ve made. I attribute this not just to the excellent quality of chocolate used (I used Valrhona Manjari), but also Pierre Herme’s superb sweet tart dough recipe. This can be made with or without the raspberries but I really think that they are so much better with. The tang of the raspberries complement the mild sweetness of the chocolate oh so very well. The velvety texture of the chocolate ganache filling is almost seductive. Have I convinced you to try this recipe yet?

Tart crust
Makes two 22-24 cm tart shells
Recipe adapted from Pierre Herme’s Chocolate Desserts

Ingredients:
142g unsalted butter (room temperature)
75g icing sugar, sifted
50g finely ground almond flour
1/4 tsp vanilla bean paste
1/4 tsp salt
1 large egg (room temperature)
245g plain flour

Method:

  1. Place butter in the bowl of a food processor fitted with the metal blade and pulse, scraping down the sides of the bowl as needed, until creamy.
  2. Add the icing sugar and process to blend.
  3. Add the almond flour, salt and vanilla and continue to process till smooth.
  4. Add eggs and process to blend.
  5. Finally, add in the flour and pulse till mixture starts to come together. Stop when the dough starts to gather into a ball. Do not overwork the dough.
  6. Gather dough into a ball and divide it into 2 pieces.
  7. Press each piece into a disc and wrap with plastic wrap. Allow the dough to rest in the refrigerator for at least 4 hours or up to 2 days.
  8. The dough can be kept frozen for up to a month when wrapped airtight.
  9. To bake, butter a tart ring. On a lightly floured surface, roll the dough to a thickness of between 2 – 4 cm, lifting the dough often and making certain that the work surface and the dough are amply floured at all times.
  10. Roll the dough up around your rolling pin and unroll it onto the tart ring. Fit the dough into the bottom and up the sides of the ring, then run the rolling pin across the top of the ring to cut off the excess.
  11. Prick the dough all over with a fork and chill it for at least 30min in the refrigerator.
  12. Preheat oven to 350ºF. Fit a circle of baking parchment into the crust and fill with dried beans or rice.
  13. Bake for 18-20 mins, then remove the parchment and beans and bake for another 3-5 mins, until shell is golden.
  14. Transfer to a rack to cool.

The filling

Ingredients:
55g raspberries
145 bittersweet chocolate
115g unsalted butter, cut into cubes
1 large egg, stirred with a fork (at room temperature)
3 large egg yolks, stirred with a fork (at room temperature)
2 tbsp sugar

Method:

  1. Center a rack in the oven and preheat the oven to 375ºF.
  2. Fill the cooled tart crust with raspberries.
  3. Melt the chocolate and the butter in separate bowls in a bain marie or in a microwave.
  4. Allow them to cool until they just feel warm to the touch (104ºF).
  5. Using a small whisk or spatula, stir the egg into the chocolate, stirring gently in widening circles and taking care not to agitate the mixture. Do not beat air into the ganache.
  6. Slowly, stir in the egg yolks little by little, followed by the sugar.
  7. Finally, stir in the warm melted butter.
  8. Pour the ganache over the raspberries in the tart shell.
  9. Bake the tart for 11 mins, not more. The centre of the tart will still jiggle, but it will set.
  10. Allow to cool for 10 min before serving.

Sticky Date Pudding

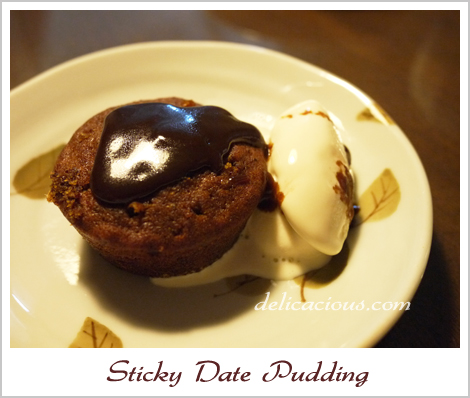
The dates had been sitting in the fridge, unopened in their package for many many months. It’s a good thing that dates keep well as I have a bad habit of buying stuff and not using them. One Sunday afternoon, after flipping through a few recipe books, I decided that I would use them in a sticky date pudding. The recipe looked simple, and so, thinking that I had ample time to complete it before dinner, I busied myself with other things. To my horror, I realised a few hours later that the chopped dates needed to be soaked in hot water for an hour before they could be used. Processing of the dates (pitting them and chopping them) also took longer than expected. I ended up with a bowl of mashed dates with insufficient time to complete the recipe. So the dates (mashed this time), went back to the fridge, in a bowl covered with cling film.

A few days later (didn’t I say dates keep well?), I finally had the time to finish the recipe. And oh wasn’t it lovely. The pudding melts in your mouth and the aroma of the dates, together with the toffee sauce was simply heavenly. Family members and colleagues all loved it and I believe you would too! This is definitely a recipe worth trying.

Sticky Date Pudding
(Makes 12 small cakes)
Recipe adapted from Desserts By The Yard

Ingredients:
8 ounces pitted Medijool dates, finely chopped
1 cup boiling water
1 3/4 cups all purpose flour
1 1/2 tsp baking powder
1/8 tsp salt
1 tsp baking soda
4 ounces unsalted butter, softened
3/4 cup packed light brown sugar
1/4 cup sugar
1/4 tsp grated orange zest
1 tsp Trablit coffee extract
2 large eggs, room temperature

Method:

  1. Place the chopped dates in a bowl and pour on boiling water. Let it sit for 1 hour.
  2. Preheat the oven to 350ºF with a rack placed in the middle shelf. Butter 2 cupcake trays.
  3. Sift together flour, baking powder and salt.
  4. Mash dates in the bowl with the water. Stir in baking soda and set aside.
  5. Using a stand mixer, cream butter, brown sugar, sugar, orange zest and coffee extract on medium until fluffy.
  6. Add eggs one at a time, scraping down the bowl after each addition.
  7. Beating on low speed, alternate half the date mixture with half the flour mixture.
  8. Add in the remaining date mixture, then the flour mixture.
  9. Pour into prepared cupcake tray and place in the oven.
  10. Bake for 15 minutes, rotate the pan from front to back and bake for another 10 minutes.
  11. When the cake is done, remove from oven. While the cake is still hot, poke the cake in several places with a skewer and pour on the toffee sauce (see below).
  12. Serve warm, with vanilla bean ice-cream for extra decadence.

Toffee Sauce

Ingredients:
3/4 cup packed dark brown sugar
1 cup heavy cream
1 tbsp unsalted butter
1 tbsp vanilla bean paste
1/4 cup milk
2 tbsp light corn syrup
1 tbsp water (optional)

Method:

  1. Place the brown sugar, cream, butter, vanilla paste, milk and corn syrup in a heavy saucepan.
  2. Simmer over medium-high heat until the mixture thickens and cots the back of a spoon, about 10 minutes.
  3. Continue to cook until golden brown, 1 to 2 minutes more.
  4. Remove from heat and keep warm.

Banana Walnut Bread

Hubby bought a huge bunch of bananas some time back, and since it’s just the two of us, most of the bananas ripened (or over ripened) before we could eat them. We froze about 8 of them in a box – over ripe bananas freeze well, without their skins of course, and are delicious in all kinds of baked goods.

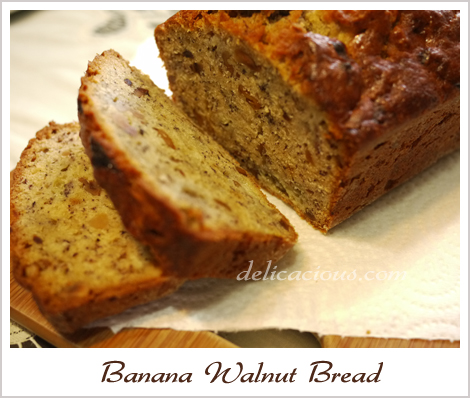
Seeing that I had some leftover walnuts from the not so recent mooncake making attempts, I decided to try a recipe from the book “The new best recipe“. The recipe is really simple because it does not require the use of a mixer. All the mixing can be done just with a wooden spoon and spatula. The results, as you can see from the picture above, is a moist, fragrant and very flavourful banana walnut bread. One of the best I’ve tasted, if I say so myself. Below is the slightly modified recipe that I used from the book.

Banana Walnut Bread
(Makes one 9-inch loaf)

Ingredients:
2 cups unbleached all purpose flour
1 cup of walnuts, chopped coarse
3/4 cup sugar
3/4 tsp baking soda
1/2 tsp salt
4 very ripe medium sized bananas (mashed)
1/4 whipping cream
2 large eggs, lightly beaten
6 tbsp melted and cooled unsalted butter
1 tsp vanilla extract

Method:

  1. Preheat oven to 350 degrees F and place an oven rack in the middle position. Grease and flour the bottom and sides of a 9 by 5 inch loaf pan.
  2. Lightly toast chopped walnuts on a baking sheet till fragrant.
  3. Whisk flour, sugar, baking soda, salt and walnuts together in a large bowl. Set aside.
  4. Mix mashed bananas, cream, eggs, butter and vanilla with a wooden spoon in a medium bowl.
  5. Lightly fold the banana mixture into the dry ingredients with a rubber spatula until just combined. Do not overmix.
  6. Scrape the batter into the prepared pan and bake till loaf is golden brown and a toothpick inserted in the centre comes out clean, about 55 minutes.
  7. Cool in the pan for 5 minutes, then transfer to a wire rack. Serve warm or at room temperature.
  8. The bread can be wrapped with plastic wrap and stored at room temperature for up to 3 days. It is best consumed on the day it is baked though.

Hot Cross Buns

I will confess that I’ve never baked bread before. Yes. Me, an avid baker (well, sort of), not baked bread before? Well, that’s because I’ve always been intimidated by the one million steps required to bake bread. The activating of the yeast, the proofing, the punching, the re-proofing. It all seems to tedious. Nevertheless, I really wanted to do something for Easter and so I decided to take the plunge.

I found a basic recipe online and changed a couple of things. It all turned out rather well I would say. The only silly thing I did was that I killed the yeast on the first try – my milk was a tat bit too hot. I had to pour away the yeasty milk and start over. Thank goodness I had enough yeast left. The proofing took less time than expected; the punching down of the dough was fun. All in all, I might try this again.

Like I posted on facebook, I never quite understood the link between Good Friday, Easter, Bunnies and perhaps even the buns. But I liked how hot cross buns are decorated with the icing cross. It reminds me of my Saviour’s sacrifice for me on the cross many many years ago. And how I’m only here because He gave. Happy Easter everyone.

Hot Cross Buns (makes 12 buns)

180 ml milk
7 g instant dry yeast
1/2 tsp caster sugar
500g plain white flour
55g light brown sugar
1 tsp ground cinnamon
1/4 tsp ground ginger
1/4 tsp mixed spice
1/4 tsp ground nutmeg
1/2 tsp salt
55 g unsalted butter (slightly soft at room temperature)
2 large eggs
85g mixed fruit and peel (cherries, sultanas and fruit peel)
25g dried cranberries

Egg wash:
1 large egg
1 tbsp milk

Glaze (for cross):
70g icing sugar (sifted)
1 tbsp milk

Instructions:

  1. Gently warm milk to about 38 degrees C. Add yeast and caster sugar and stir. Set aside till yeast is foamy (about 5-10 min).
  2. Combine flour, brown sugar, spices and salt in a large mixing bowl. Add foamy yeast mixture to the dry ingredients and blend to combine using an electric mixer.
  3. Add eggs, one at a time, and mix well after each addition.
  4. Turn the mixer speed down, and add in the butter. Mix till butter is well combined and the dough comes together.
  5. Attach the dough attachment to the mixer, and knead the dough until it is elastic (about 5-7 min).
  6. Transfer dough to a lightly floured surface, and knead in the dried fruit.
  7. Place dough in a large, lightly greased bowl. Flip the ball of dough once so that the surface of the dough is lightly greased.
  8. Cover with plastic wrap and allow to rise in a warm place until it has doubled in size. (About 1 hour plus)
  9. When dough has doubled, punch it down, and cut it into 12 equal pieces.
  10. Shape each piece into a ball and place it on a baking sheet lined with baking paper. Ensure that they are spaced out to allow space for further rising.
  11. Combine one egg with one tablespoon of milk to make an eggwash.
  12. Brush eggwash over the top of each ball of dough.
  13. Cover with a clean towel/plastic wrap and allow them to double in size (about 30 minutes)
  14. Preheat oven to 205 degrees celsius.
  15. Brush top of buns with eggwash again and using a sharp, greased knife, make a cross at the top of each bun.
  16. Bake for 15 minutes, or until buns are nicely browned.
  17. Cool them on a wire rack.
  18. Meanwhile, combine icing sugar with milk to form a glaze.
  19. Fill a piping bag with glaze and pipe crosses on the top of each bun when bun has cooled.